

In the world of digital finance, security is not a luxury — it’s a necessity. With the rising popularity of cryptocurrencies, investors are becoming increasingly aware of the need for safe storage solutions. This is where Trezor, one of the most trusted hardware wallets in the crypto community, steps in. If you’ve recently purchased a Trezor wallet or are curious about how to securely access your digital assets, this guide will walk you through everything you need to know about the Trezor login process, its importance, and how to troubleshoot common issues.
What Is Trezor?
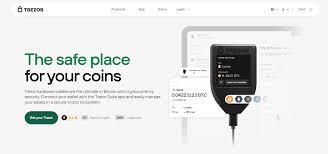
Trezor is a hardware wallet designed to keep your cryptocurrencies secure by storing your private keys offline. Unlike software or online wallets, a hardware wallet like Trezor minimizes the risk of hacking, phishing, or malware attacks. Developed by SatoshiLabs, Trezor has become a pioneer in cold storage solutions, supporting hundreds of cryptocurrencies including Bitcoin, Ethereum, Litecoin, and many more.
The device works as a bridge between the online world and your crypto assets, allowing you to safely manage your funds through a secured Trezor login interface.
Why the Trezor Login Process Matters
The Trezor login process is not just about accessing your account; it’s about ensuring that your assets are protected every step of the way. When you connect your Trezor device to your computer or mobile phone, you are prompted to verify your identity and approve transactions directly on the hardware wallet. This means even if your computer is compromised, your private keys remain secure inside the Trezor device.
This additional layer of security ensures that no unauthorized person can access your funds — even if they know your password or PIN. The Trezor login is designed with multiple security layers, such as the PIN, passphrase, and recovery seed, all working together to keep your crypto safe.
Step-by-Step Guide to Trezor Login
If you’re new to Trezor, here’s how to log in securely and start managing your digital assets:
Step 1: Connect Your Trezor Device
Use the provided USB cable to connect your Trezor wallet (Trezor One or Trezor Model T) to your computer or smartphone. Once connected, a prompt should appear asking you to visit the official Trezor Suite application or website.
Step 2: Open Trezor Suite
Go to the official site — suite.trezor.io — and download the Trezor Suite app for your operating system. Avoid third-party links or suspicious sites, as they may be phishing attempts.
Step 3: Enter Your PIN
When logging in, the Trezor device will display a randomized PIN layout on its screen. Enter the corresponding digits on your computer’s screen. This system ensures that even if a hacker records your keystrokes, they cannot determine your actual PIN.
Step 4: Use Your Passphrase (Optional)
For advanced users, Trezor offers an optional passphrase feature. This acts as a 25th word to your recovery seed, providing an extra layer of security during your Trezor login. It’s highly recommended for those storing large amounts of crypto.
Step 5: Access Your Dashboard
Once you’ve completed the login, you’ll be taken to your Trezor Suite dashboard. Here, you can view your portfolio, send or receive coins, and manage accounts securely.
Troubleshooting Common Trezor Login Issues
Even though Trezor login is designed to be user-friendly, you might occasionally face issues. Here are some common problems and solutions:
-
Device Not Recognized: Ensure your USB cable and ports are working properly. Try a different cable or port if necessary.
-
Browser Connection Error: Use a supported browser like Chrome or Firefox, and make sure to install the latest Trezor Bridge software.
-
Incorrect PIN Attempts: Be cautious — after several wrong attempts, the device increases the waiting time between retries to prevent brute-force attacks.
-
Phishing Warnings: Always double-check that you’re on the official Trezor website before entering any information.
Security Tips for a Safe Trezor Login Experience
-
Bookmark the Official Site: Always access the Trezor login page from your bookmarks to avoid phishing.
-
Never Share Your Recovery Seed: The 12, 18, or 24-word recovery phrase is the key to your wallet. Keep it offline and never share it.
-
Keep Firmware Updated: Regularly update your device firmware to benefit from the latest security improvements.
-
Use a Strong Passphrase: If you enable the passphrase feature, choose a complex one that’s difficult to guess.
Why Trezor Login Is the Gold Standard for Crypto Security
The beauty of Trezor login lies in its simplicity and security synergy. Unlike web-based wallets that depend solely on passwords, Trezor combines offline storage with user verification directly on the device. This makes it virtually immune to online hacks, offering peace of mind to crypto investors.
With Trezor, you’re not just logging into a wallet — you’re taking full control of your financial independence in the digital age.
Final Thoughts
The Trezor login process embodies the core principles of cryptocurrency: privacy, autonomy, and security. Whether you’re a seasoned investor or a beginner taking your first step into the crypto world, using Trezor ensures that your digital assets remain safe from prying eyes and cyber threats.
By understanding how the Trezor login system works and following best practices, you can confidently manage your crypto portfolio while keeping your investments out of harm’s reach. In a landscape where digital security is constantly tested, Trezor stands as a fortress protecting your financial future.