

Introduction
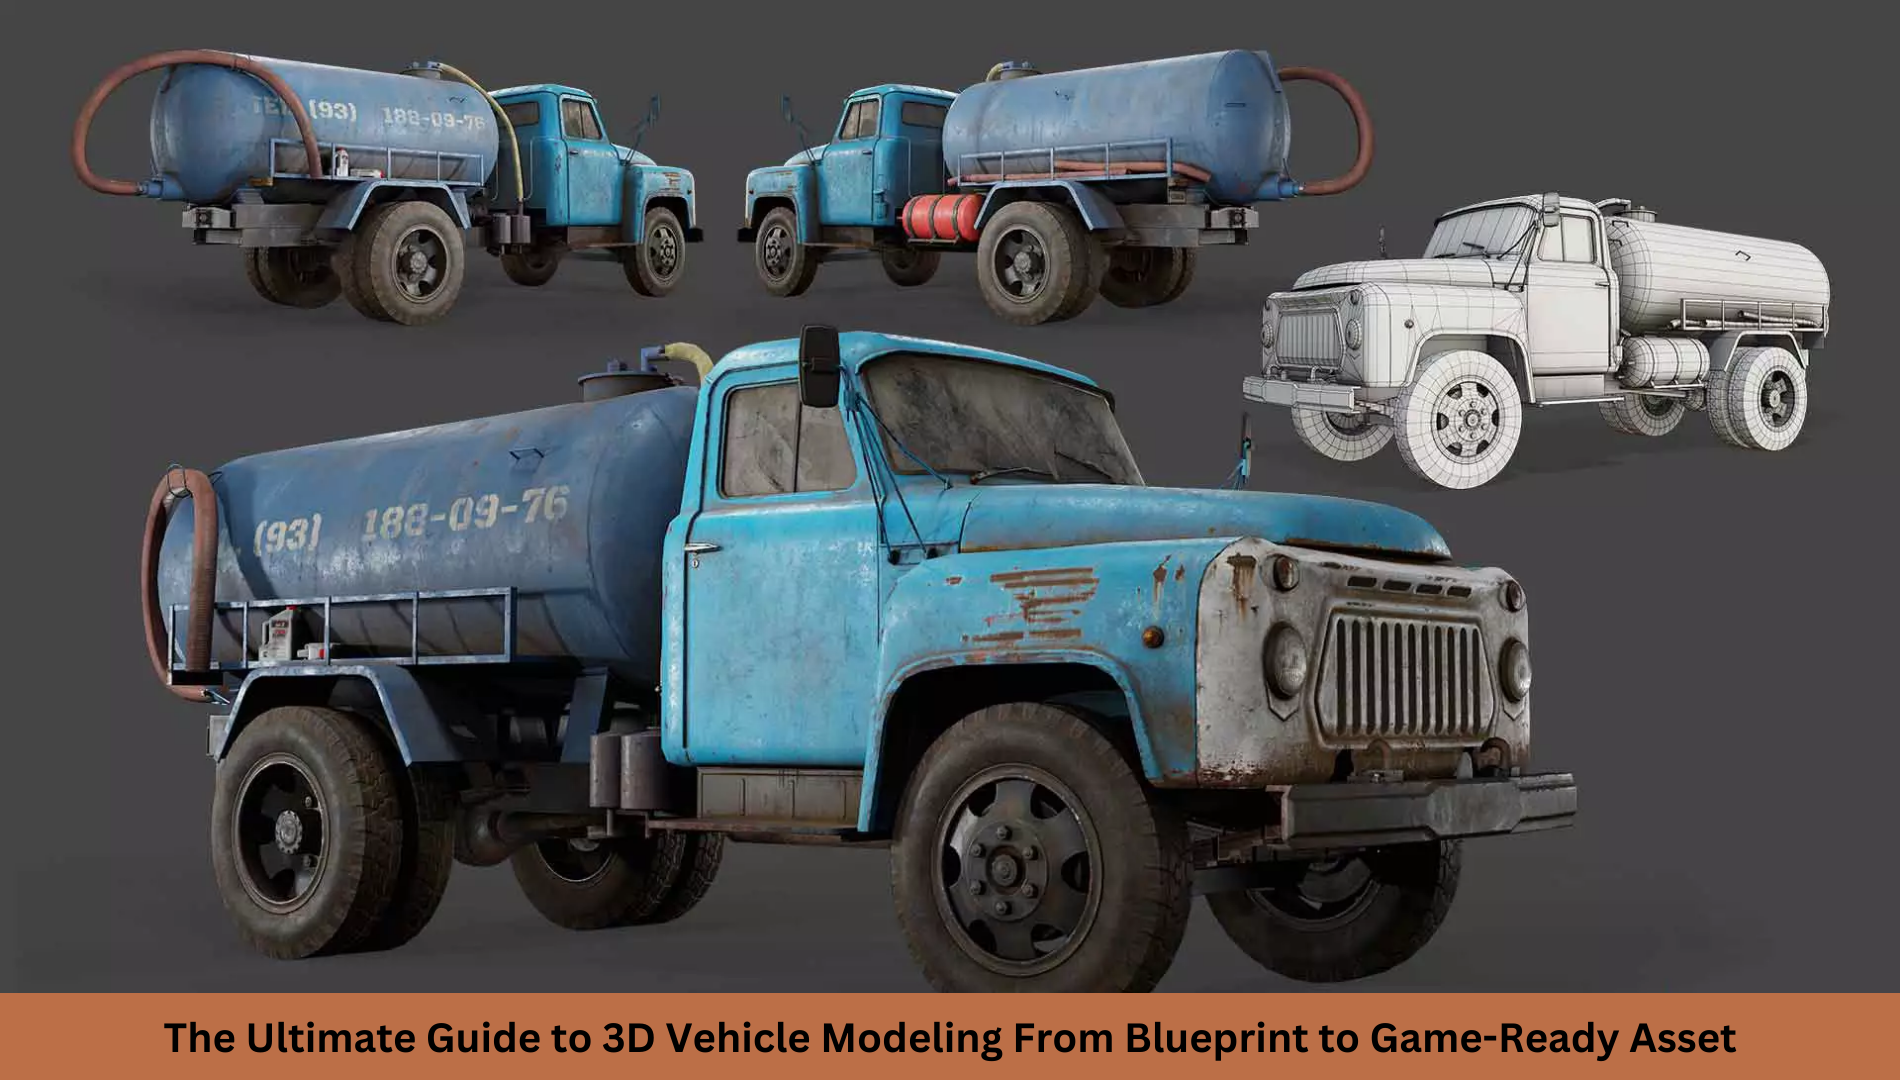
3D vehicle modeling is a crucial skill in the world of game development and animation. Whether you're creating a sleek sports car for a racing game or a rugged truck for an open-world adventure, mastering the process of 3D vehicle modeling is essential. This guide will walk you through the steps from working with blueprints to producing game-ready assets. We’ll also discuss techniques like 3D hard surface modeling, optimizing for 3D game environments, and ensuring your car 3D model is high-quality yet efficient for real-time rendering.
Step 1: Gathering References and Blueprints
The first step in creating a 3D vehicle model is collecting high-quality references and blueprints. These blueprints provide accurate proportions and essential details for modeling. Websites like The-Blueprints.com or Blueprints.com offer a vast collection of top, side, front, and rear views of vehicles.
Best Practices:
-
Gather multiple high-resolution images of the vehicle from different angles.
-
Look for mechanical details, such as the wheel wells, grilles, and engine compartments.
-
Use a blueprint as a background image in your 3D modeling software.
Step 2: Blocking Out the Basic Shape
Once you have your reference images, start with a basic blockout of the vehicle. This stage focuses on capturing the general proportions and form before diving into intricate details.
Techniques:
-
Use simple geometry like cubes and cylinders to define the overall structure.
-
Ensure proper alignment with your reference blueprint.
-
Work in a low-poly state to maintain flexibility.
This stage is crucial for 3D hard surface modeling, ensuring clean and structured topology before adding complexity.
Step 3: Refining the Shape and Adding Details
After the basic shape is established, refine the vehicle’s form by adding secondary details like headlights, side mirrors, and air intakes.
Key Considerations:
-
Use edge loops and subdivision surfaces for smooth curves.
-
Maintain clean topology to avoid shading artifacts.
-
Keep polygon counts optimized for 3D game assets to ensure efficiency in rendering.
Step 4: Hard Surface Modeling Techniques
Hard Surface Modeling is essential for creating mechanical and rigid objects like vehicles. Unlike organic modeling, this technique focuses on crisp edges and well-defined shapes.
Tips for Hard Surface Modeling:
-
Use chamfers or bevels instead of sharp edges to catch light properly in-game engines.
-
Apply non-destructive workflows like modifiers in Blender or subdivision surfaces in Maya.
-
Optimize your mesh for real-time engines like Unity or Unreal Engine.
This approach ensures that your 3D vehicle modeling integrates seamlessly into 3D game environments.
Step 5: Creating the Wheels and Additional Props
Wheels are a crucial part of any car 3D model. They require precise detailing to appear realistic.
Modeling the Wheels:
-
Start with a cylinder and shape it to match the tire proportions.
-
Use a radial array for tire treads.
-
Model rims separately, ensuring intricate details without excessive polygon usage.
Additionally, props like fuel tanks, exhaust pipes, and spoilers can add uniqueness to your props 3D model collection.
Step 6: UV Unwrapping and Texturing
Once your model is complete, it’s time for UV unwrapping, a process that prepares the model for texturing. Game engines require efficient UV mapping to ensure textures are applied correctly.
Best Practices:
-
Avoid overlapping UVs unless using tiling textures.
-
Use a UV checker map to detect stretching or distortion.
-
Pack UVs efficiently to maximize texture resolution.
For texturing, software like Substance Painter, Photoshop, or Quixel Mixer can help create high-quality materials. Aim for PBR (Physically Based Rendering) materials to ensure realism in 3D game environments.
Step 7: Optimizing for Game Engines
To make your 3D game asset game-ready, optimization is key. A high-poly model might look great in renders, but it needs to be reduced for performance in 3D modeling games.
Optimization Techniques:
-
Use normal maps to capture high-poly details on a low-poly mesh.
-
Reduce unnecessary polygons, especially in unseen areas.
-
Use LODs (Level of Detail) to optimize rendering performance in 3D game environments.
Step 8: Exporting and Importing into a Game Engine
Now that your 3D vehicle model is complete, it’s time to bring it into a game engine like Unity or Unreal Engine.
Steps to Follow:
-
Export your model in FBX or OBJ format.
-
Ensure textures and materials are correctly assigned.
-
Check scale consistency between your 3D software and game engine.
-
Test the model in various 3D game environment to ensure proper lighting and shading.
Conclusion
Creating a game-ready 3D vehicle model requires careful planning, attention to detail, and an understanding of optimization techniques. From using blueprints to implementing 3D hard surface modeling, every step plays a crucial role in achieving a high-quality asset. By following this guide, you can build vehicles that enhance 3D modeling games, ensuring they integrate seamlessly into 3D game assets collections and 3D environment modeling.
Start practicing today, and soon, you’ll be crafting impressive, immersive 3D game environment with stunning, realistic vehicles!